Hardware configuration
With a supported cellular module and a SIM card, you need to set up your hardware to use cellular on Meadow. This process will depend on your cellular board and the Meadow device that you intend to use.
For a list of supported cellular modules, see the Supported Cellular Modules.
Quectel BG95-M3 with NimbeLink Skywire click board
To set up this hardware, you could use a Skywire click adapter, which hosts NimbeLink/Skywire cellular modems (using stacking headers) to MikroElektronika development boards. For simplicity, we may refer to this combination as Quectel BG95-M3 throughout this tutorial instead of specifying both Quectel BG95-M3 and NimbeLink Skywire click board.
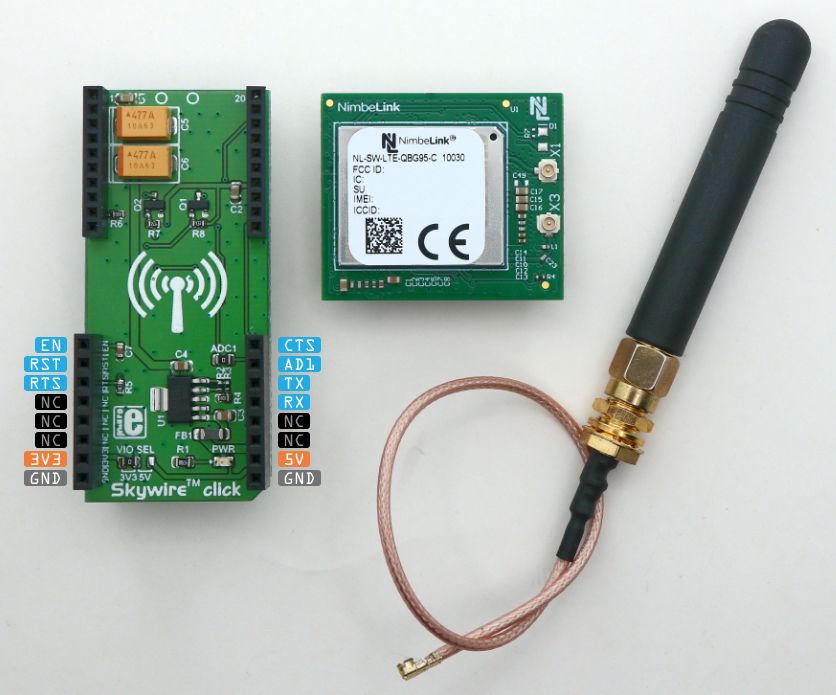
Start by connecting the necessary jumpers for communication between the Meadow device and the cell module. Then make the necessary connections to supply and enable the cell module. Finally, connect an antenna to the click board.
Setting up Quectel BG95-M3 using a Meadow F7v2 Feather
In the following example, we'll demonstrate how to set up the Quectel BG95-M3 module with a NimbeLink Skywire click board on the Meadow F7v2 Feather.
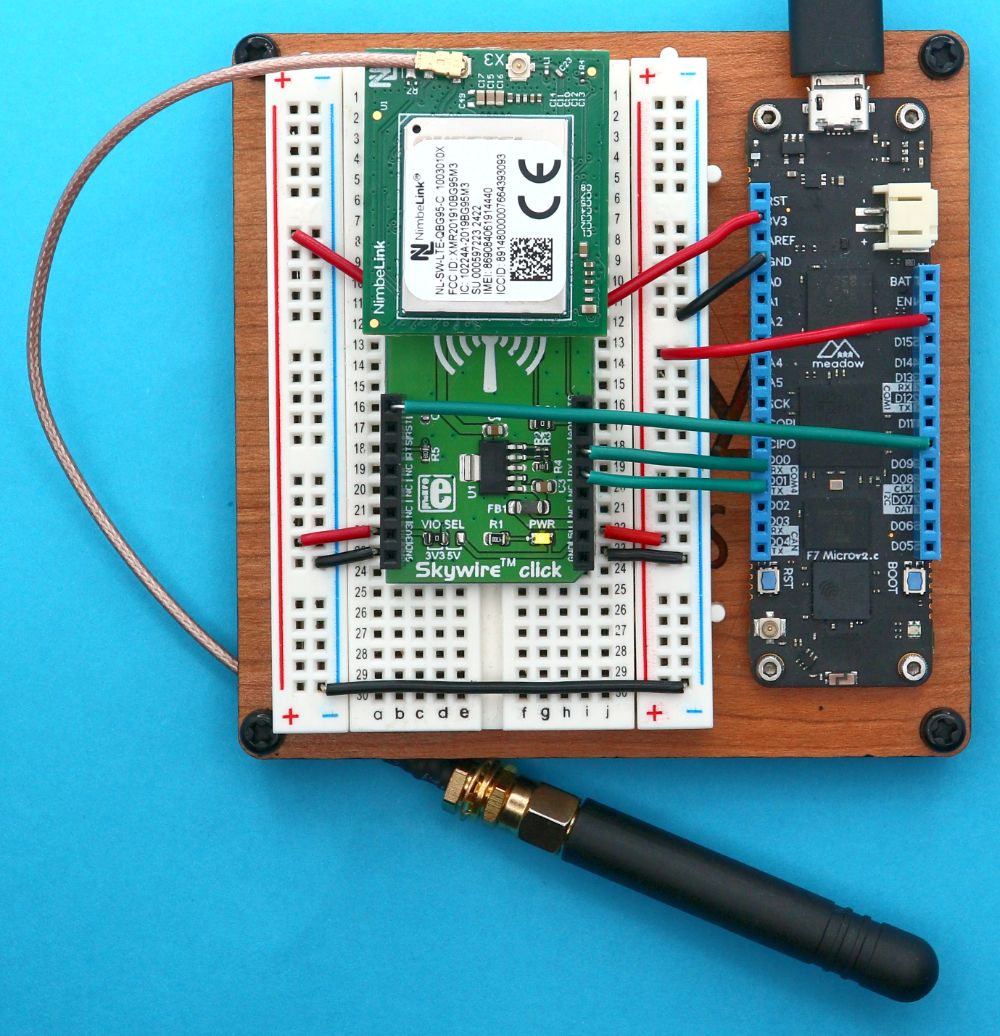
Step 1: Connect the serial pins (UART)
If you're using a Meadow F7v2 Feather board, you will need to connect D00 and D01 pins to the TX and RX click board pins, respectively, to establish the data communication between them.
Step 2: Connect enable and supply pins
You need to connect the D10 pin to the EN NimbeLink Skywire click board pin. Additionally, connect the 3.3V, 5V, and GND pins on both sides of the Skywire click board. If you are using another click board for the BG95-M3 module, you need to connect the D10 pin to the equivalent power-up pin.
Note: Feel free to use other pins to enable the cellular module, as well as another Meadow serial port, just remember to consider it when setting the cellular config file.
Step 3: Attach an antenna
Finally, connect an LTE antenna (Rubber ducky or Dome) with the X1 click board IPX connector, aiming for a preferred gain of 5 dBi (recommended) while ensuring a minimum gain of 2 dBi (required), and insert an M2M SIM card into the cell module.
Setting up Quectel BG95-M3 using a Project Lab v3
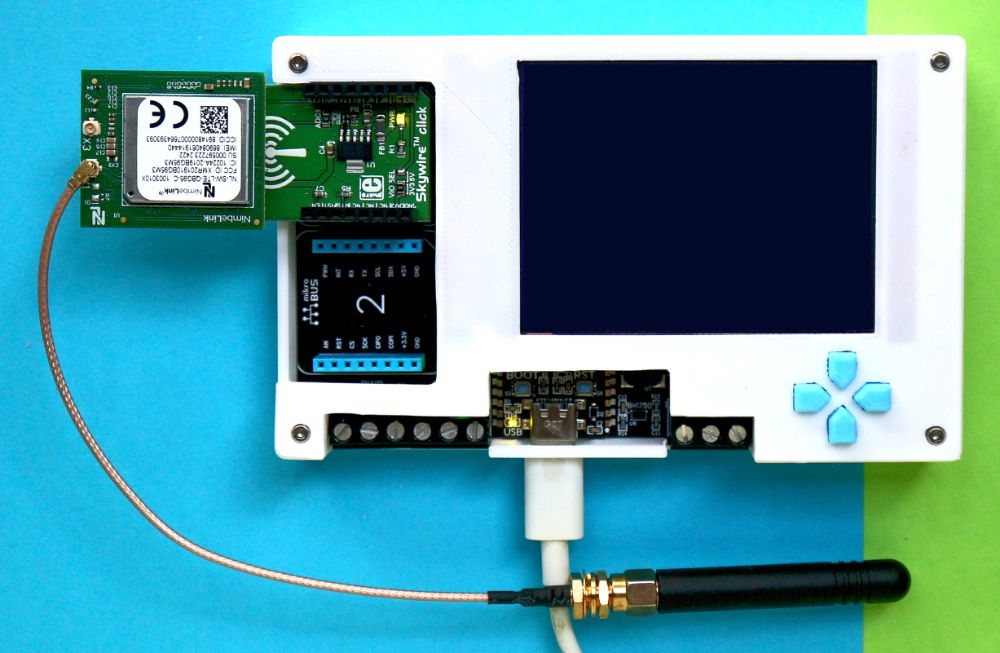
- A Project Lab has two mikroBUS connectors, so simply connect the Skywire click adapter on the mikroBUS connector 1 and you're all set! Whats left is to make a few adjustments to your Meadow application to use cellular.
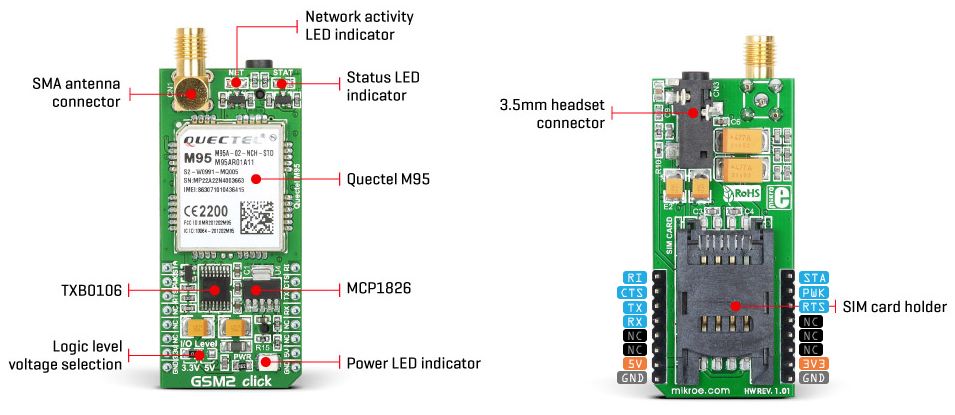
Quectel M95 with GSM2 click board
To set up this hardware, start by connecting the necessary jumpers for communication between the Meadow device and the cell module. Then make the necessary connections to supply and enable the cell module. Finally, connect an antenna to the click board.
For simplicity, we may refer to this combination as Quectel M95 throughout this tutorial instead of specifying both M95 and GSM2 clickboard.
Setting up Quectel M95 using a Meadow F7v2 Feather
In the following example, we'll demonstrate how to set up the Quectel M95 module with a GSM2 clickboard on the Meadow F7v2 Feather.
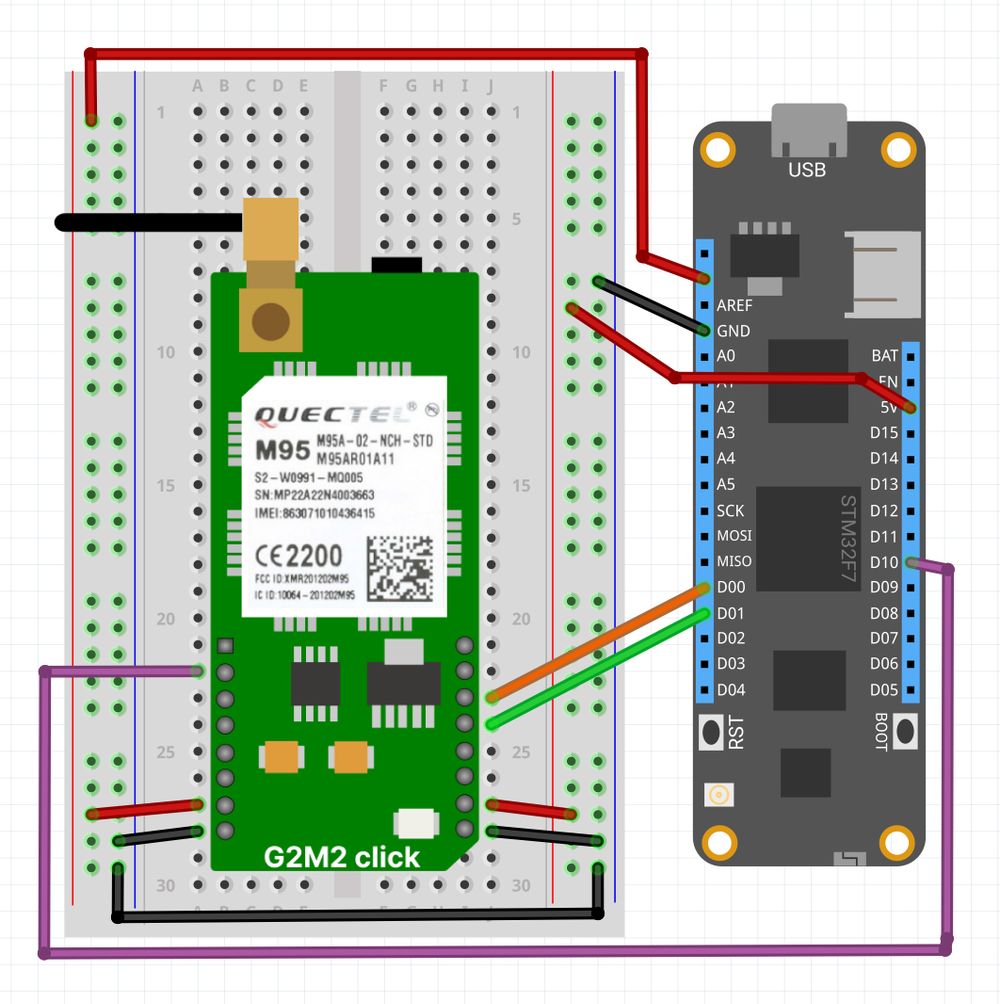
Step 1: Connect serial pins (UART)
To use this module you will need to connect the Meadow F7v2 Feather D00 and D01 pins to the TX and RX click board pins, respectively, to establish the data communication between them.
Step 2: Connect enable and supply pins
You need to connect the Meadow F7v2 Feather D10 pin to the PWK Quectel GSM2 click board pin, to enable the module. Additionally, connect the 3.3V and GND pins from the Meadow F7v2 Feather to their corresponding pins on the click board. It's recommended to provide a 5V power supply to the click board 5V and GND pins, since this module requires more energy than the LWPA modules (BG95-M3). If you are using another click board for the M95 module, you need to connect the D10 pin to the equivalent power-up pin.
Note: Feel free to use other pins to enable the cellular module, as well as another Meadow serial port, just remember to consider it when setting the cellular config file.
Step 3: Attach an antenna
Finally, establish a connection by attaching a GSM antenna (Rubber ducky) with an SMA Plug connector, aiming for a preferred gain of 5 dBi (recommended) while ensuring a minimum gain of 2 dBi (required), and insert a SIM card into the cell module.
Setting up Quectel M95 using a Project Lab v3
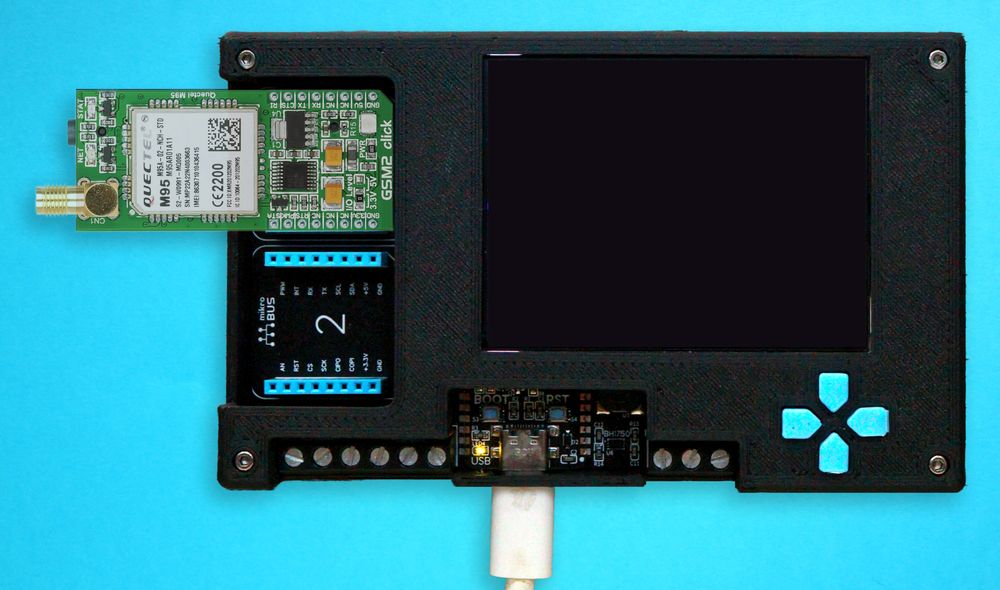
- A Project Lab has two mikroBUS connectors, so simply connect the Skywire click adapter on the mikroBUS connector 1 and you're all set! Whats left is to make a few adjustments to your Meadow application to use cellular.
Choosing a SIM Card
To enable Cat-M1 (LTE-M or eMTC) or NB-IoT network modes, a specialized M2M (Machine-to-Machine) SIM card is required, distinct from the standard SIM cards used in cellphones. However, for GSM/GPRS 2G connections, a standard SIM card can generally be used.
Next steps
Once you are set up with your cellular module, you can proceed to configure your cellular provider and connection, and then configure the Meadow pins and network settings to enable cellular on your Meadow application.
If you have trouble connecting to your cellular network, check out the Troubleshooting guide for some tips on how to scan for available networks and check the cellular network connection logs.